Since Recalbox 10.1, controller configuration has been completely redesigned. No more abstract button names: the screen shows a picture of your controller and highlights each button to press, one at a time.
¶ Starting the configuration
- Automatically: plug in (or pair) a controller unknown to Recalbox — the configuration wizard shows up by itself.
- Manually:
START→CONTROLLER SETTINGS→CONFIGURE A CONTROLLER.
¶ Step 1 — Detect your controller
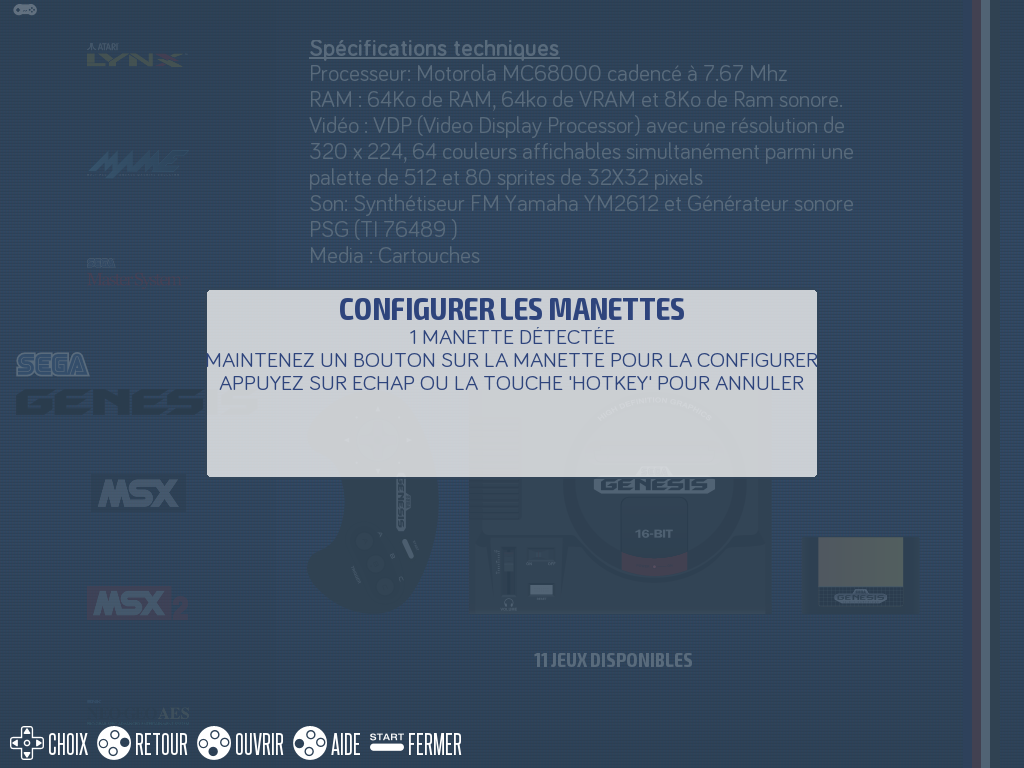
The screen shows how many controllers were detected. Hold any button for 1 second on the controller you want to configure.
¶ Step 2 — Select your controller type
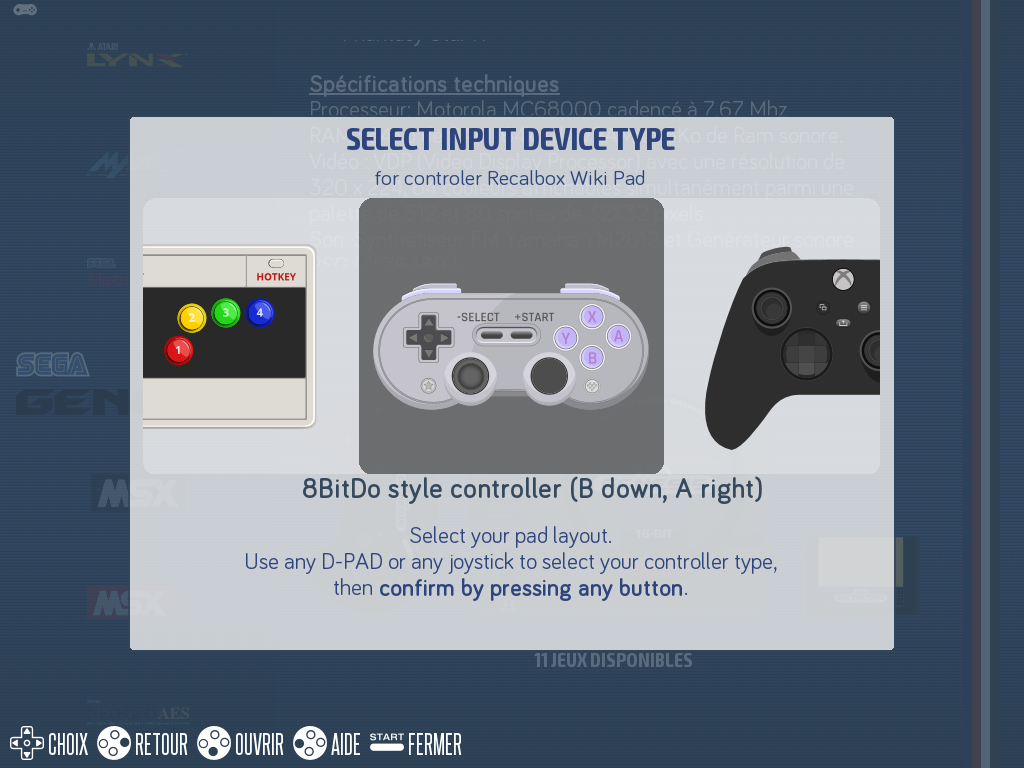
An image gallery appears (SELECT INPUT DEVICE TYPE screen): pick the visual matching your controller among the available types:
| Type | Layout |
|---|---|
| 8BitDo style controller | B down, A right |
| Xbox style controller | A down, B right |
| PlayStation style controller | Cross down, Circle right |
| Arcade joystick | 4, 6 or 8 buttons |
The type is pre-selected automatically based on the controller's name (an 8BitDo, an Xbox or a PlayStation controller is recognized out of the box). Navigate with the D-pad or joystick, then hold any button to confirm (a progress bar fills up).
¶ Step 3 — Assign the buttons
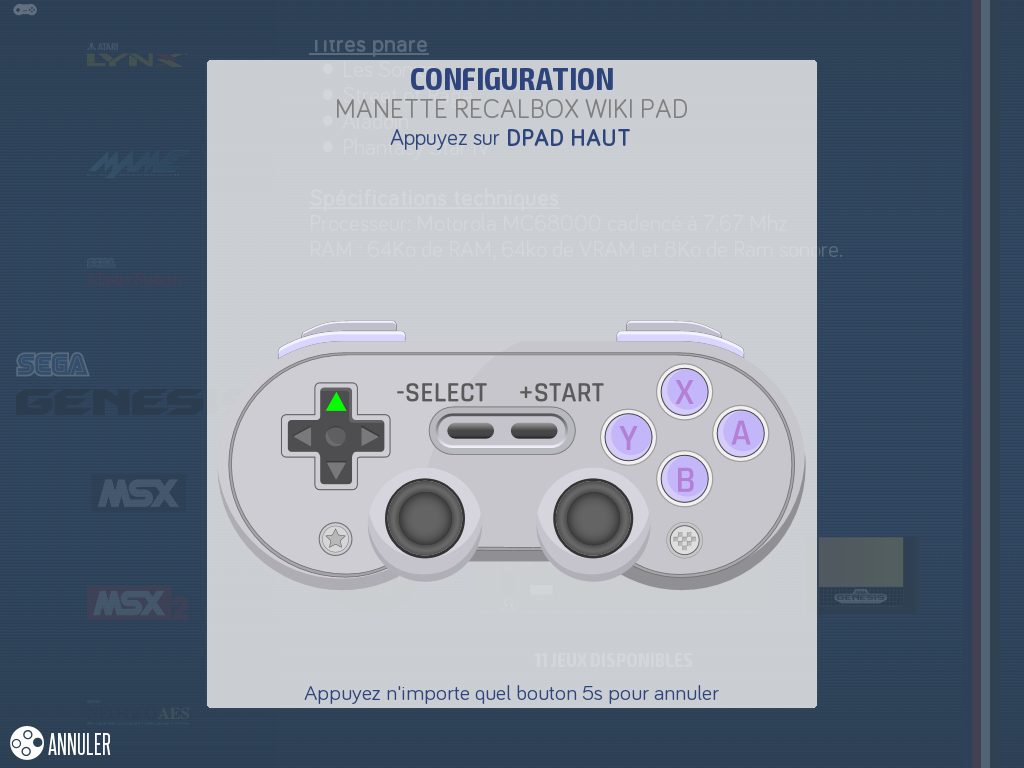
A picture of your controller is displayed and each button to press blinks in turn: simply press the matching button on your controller.
- Skip a button your controller doesn't have (L1/L2, stick clicks, Hotkey…): press
RIGHT. Essential buttons (A, B, Start, Select, D-pad) cannot be skipped. - Button already in use: pressing a button that is already assigned is rejected (shown in red) — press another one.
- Go back: possible at any time to fix the previous button.
- Cancel: hold any button for 5 seconds.
¶ Step 4 — Test your configuration
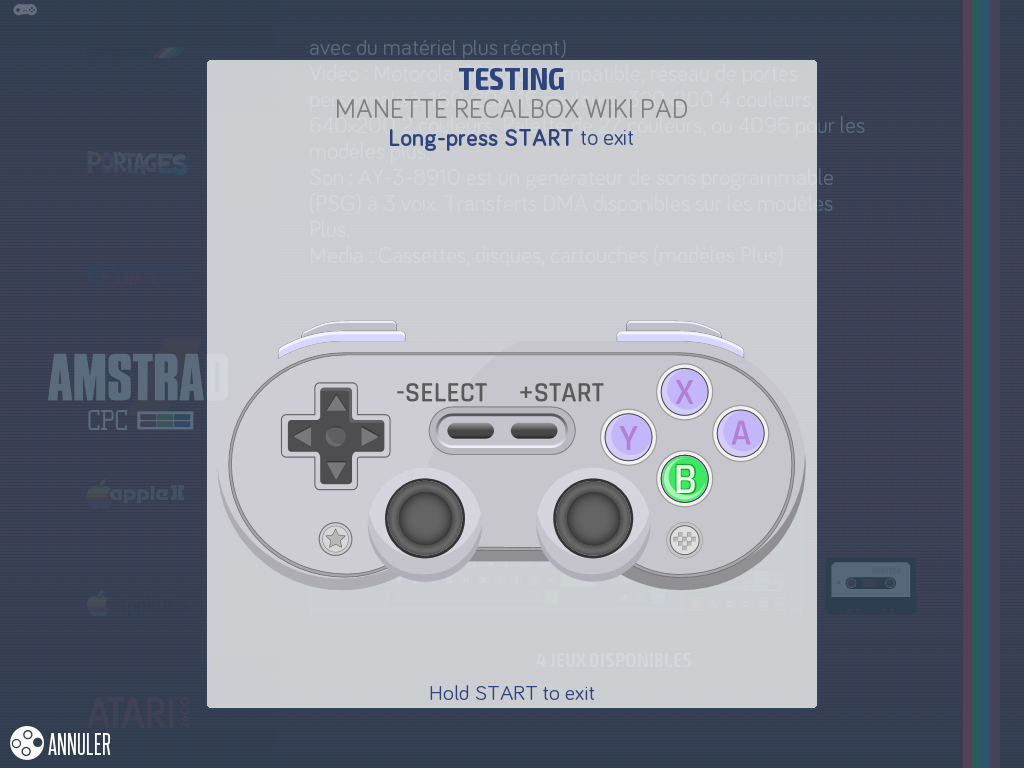
Once every button is assigned, the screen switches to test mode: every button you press lights up on the controller picture. Check that everything responds, then confirm with HOTKEY + START to save.
You can also test an already-configured controller at any time: START → CONTROLLER SETTINGS → TEST A CONTROLLER.
¶ Minimalist controllers (no Select or Hotkey)
If your controller has neither SELECT nor HOTKEY (some two-button pads, reduced panels…), Recalbox automatically emulates them with combos based on START through the built-in controller proxy (R.G.P.). The wizard guides you when needed.
¶ For advanced users
The configuration is saved in /recalbox/share/system/.emulationstation/es_input.cfg, along with the chosen controller type (gamepadtype attribute), which is then used by the emulators.