Most console games work right away, without any calibration. But some games, mostly arcade ones, need a one-time setup: either in the emulator menu, or in the game's own service menu.
These settings are kept in the NVRAM and
.cfgfiles of yoursavesfolder (in yourshare, sorted by system and emulator). Keep these files in your backups: you will only have to do the procedure once.
¶ GunCon 2: the Recalbox calibration (10.1)
With a GunCon 2 on a CRT screen (Recalbox RGB Dual / RGB JAMMA), Recalbox displays its own calibration screen when a compatible game launches:
- Shoot each target displayed on screen (the screen flashes white on each shot so the gun can lock on).
- A test phase then opens with a center bullseye reading "SHOOT HERE TO START": use it to check your aim on the edges, then shoot the center target to start the game.
- Aim is off? Press
AorSTARTduring the test phase to redo the calibration.
📷 Screenshot coming soon:
lightgun-guncon2-calibration.png
In most cases this calibration replaces the games' internal calibration. The following sections remain useful for settings specific to some emulators or arcade games.
¶ Adjusting sensitivity in MAME 2003-Plus
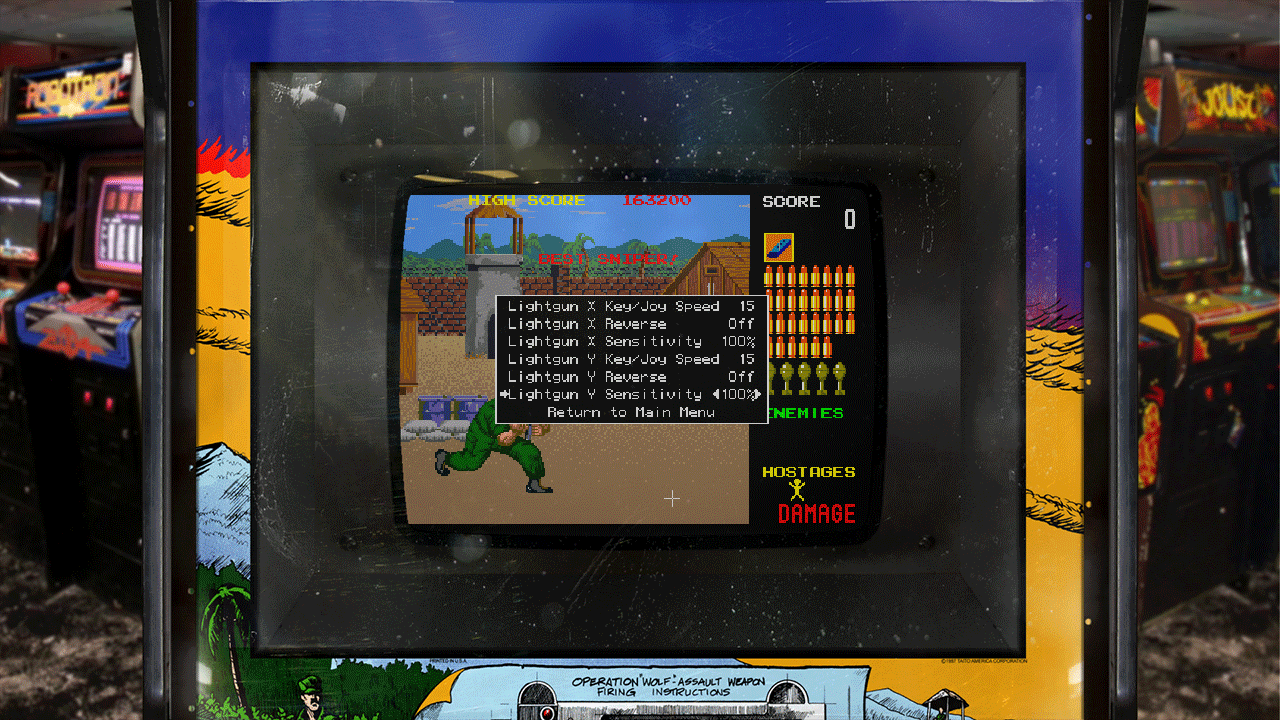
On some arcade games of the MAME 2003-Plus core, the aim does not follow the gun properly: the axis sensitivity sometimes defaults to 25%.
- In game, open the MAME menu with
L3on your gamepad. - Go down to
Analog Controlsand confirm withX(Super Nintendo layout). - Set
Lightgun X SensitivityandLightgun Y Sensitivityto 50% or even 100%. - Back out of the menus with
X: the settings apply immediately and are kept for future launches.
¶ Calibrating a Naomi game (test menu)
Naomi shooting games (House of the Dead 2, Confidential Mission…) are calibrated in their service menu, just like on the original cabinet. The procedure requires a gamepad in addition to the gun, as the test menu is driven with the stick.
Preparation, once:
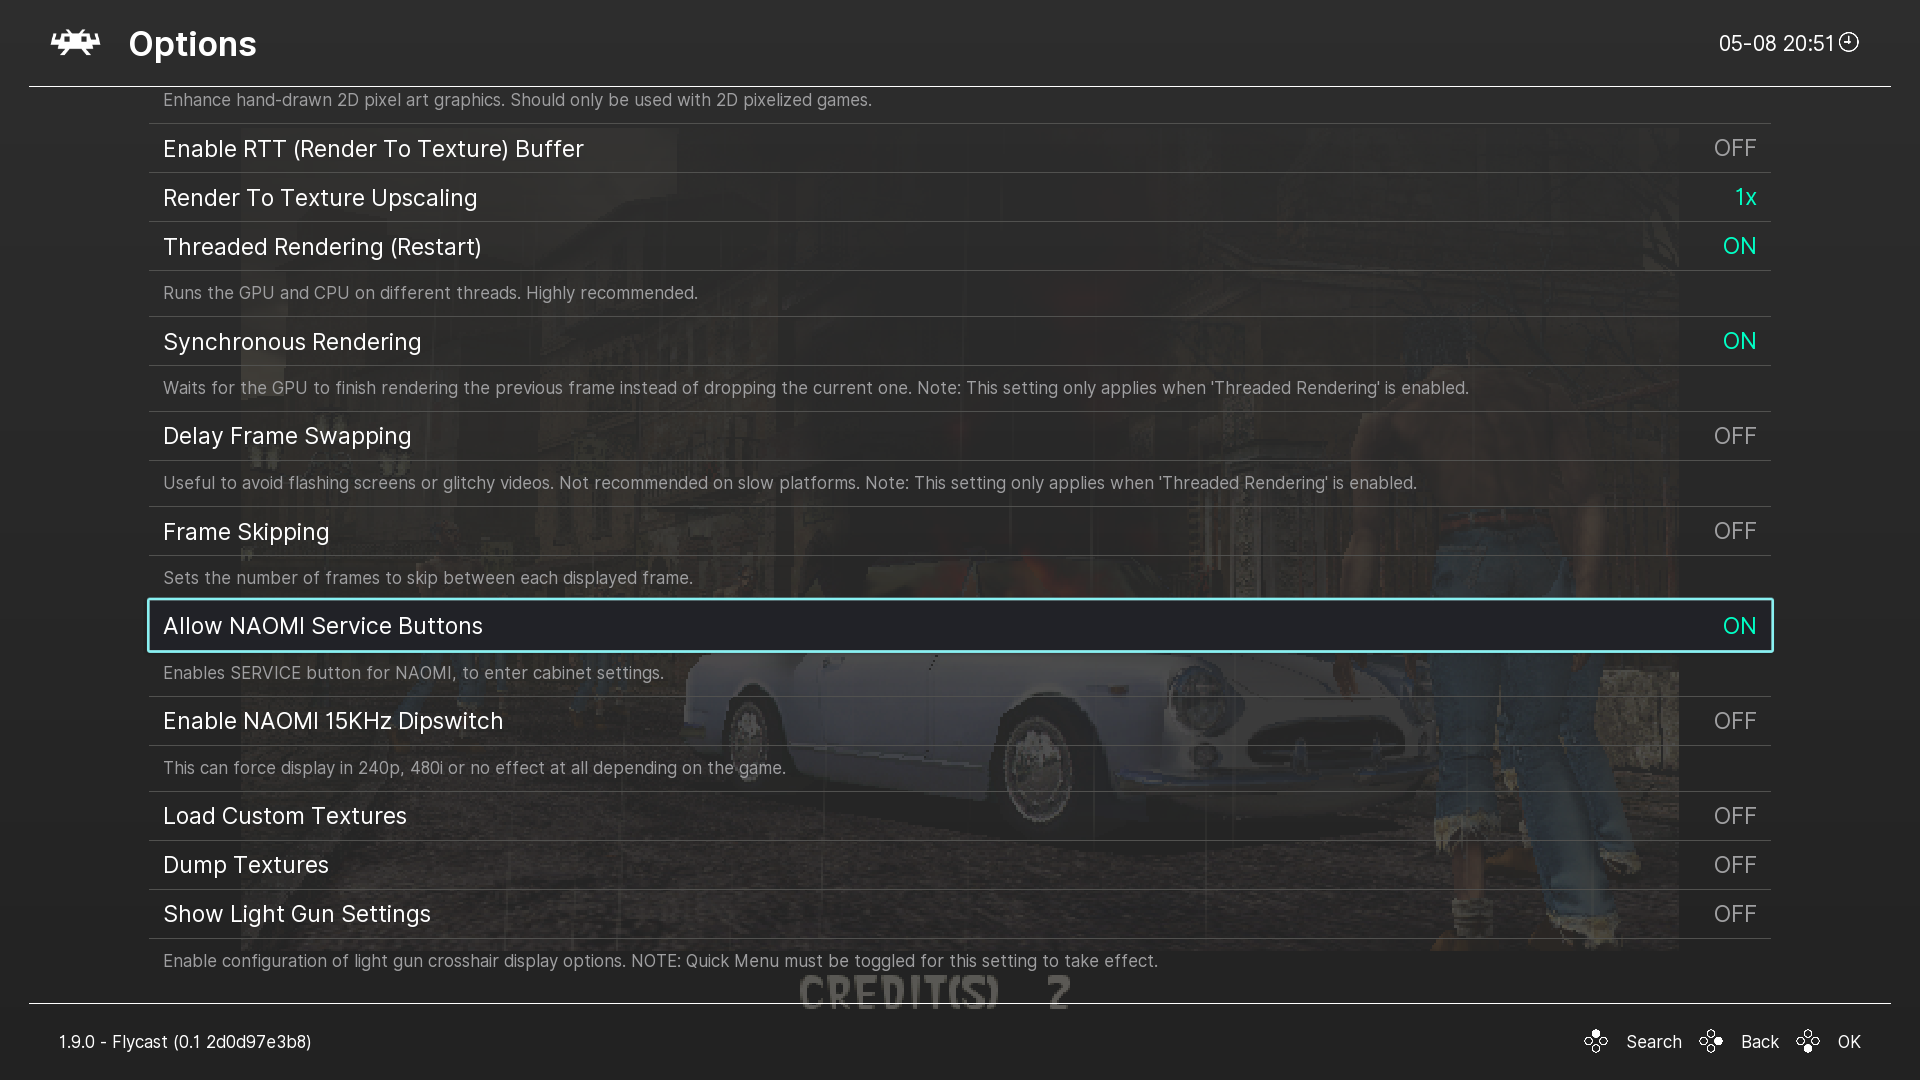
- In game, open the RetroArch menu (
Hotkey+B), go toOptionsand make sureAllow NAOMI Service Buttonsis enabled. - Still in the RetroArch menu:
Main Menu→Settings→Input→Port 1 Controls, and select the gamepad device ("controller") — the test menu cannot be driven with the gun. - Close the menu (
Hotkey+B).
In the test menu:
- Open the
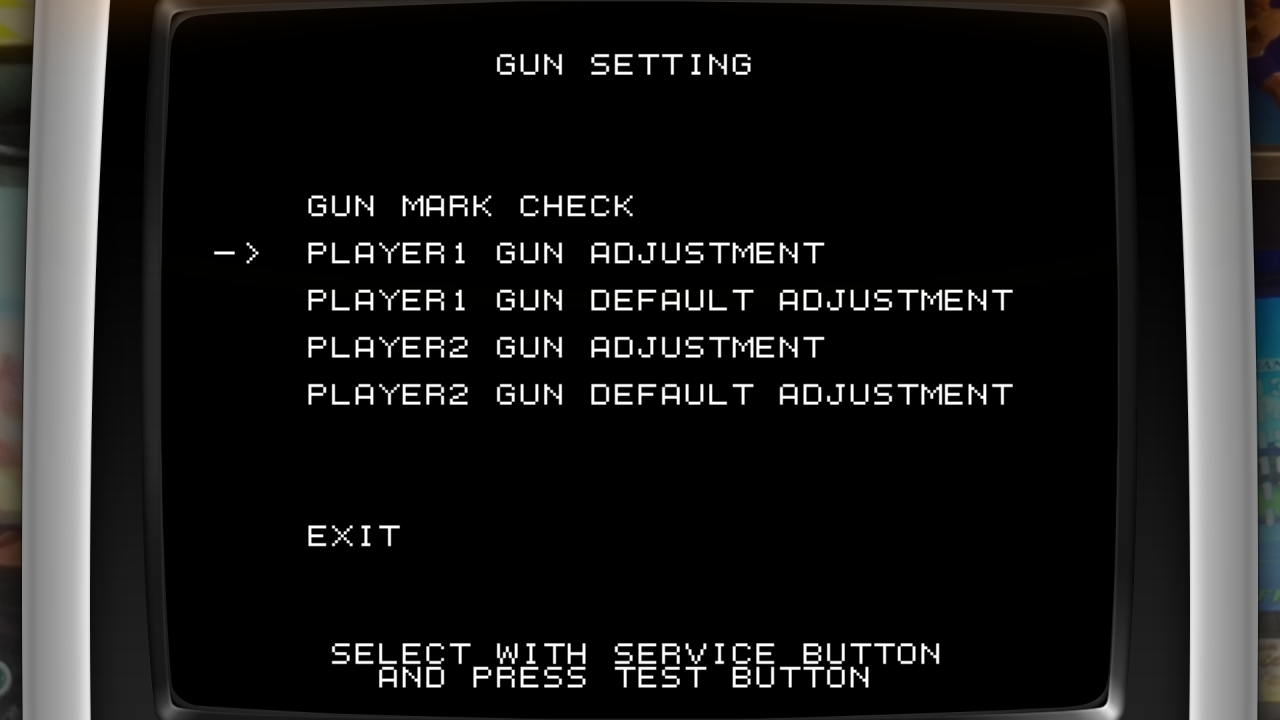
NAOMI TEST MODEwithL3. Navigate withR3(move down) and confirm withL3. - Enter
GAME TEST MODE→GUN SETTING→PLAYER1 GUN ADJUSTMENT. - Switch port 1 back to "light gun" (RetroArch menu, as in step 2) so you can shoot, then calibrate: shoot the top-left crosshair, then the bottom-right one. Check the result and the off-screen shot.
- Switch port 1 back to "controller" to confirm (
R3) and leave the menus (EXITin each menu withL3/R3). - For a second gun, do it again with
PLAYER2 GUN ADJUSTMENT. - Finally, restart the game so Recalbox's automatic lightgun configuration is cleanly reapplied.
The calibration is stored in the game's NVRAM, inside your
savesfolder: once done, it is permanent as long as you keep your saves.